Your shopping cart is empty!


Gallery - Anodising Process
This example shows how good results can already be achieved with the simplest means.
The images come from a photo series we provided for an article titled “DIY Anodizing” in Messermagazin, along with the related know-how. Clicking on an image will provide additional information.
For the following workpiece, a leftover piece of simple aluminum sheet with a thickness of 1.5 mm and dimensions of approximately 13×5 cm was used.
For the following workpiece, a leftover piece of simple aluminum sheet with a thickness of 1.5 mm and dimensions of approximately 13×5 cm was used.
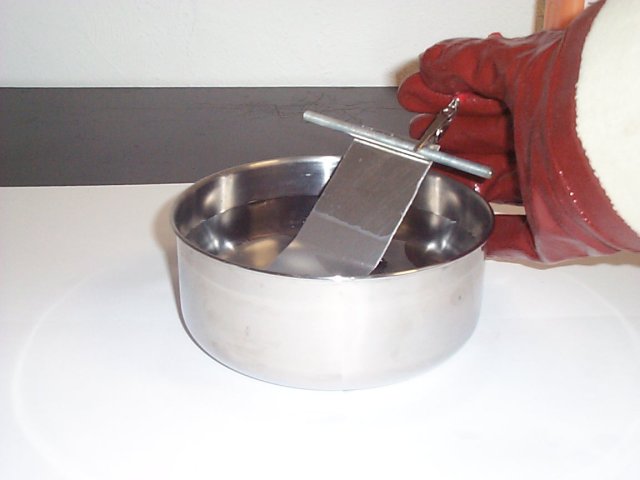
Before anodizing in the acid bath, the workpiece must be thoroughly cleaned. Special cleaning agents make gentle and reproducible cleaning easier. For a first attempt, however, a mild caustic soda solution (NaOH, around 5%) – as shown here – is sufficient. Gloves and safety goggles are still mandatory!
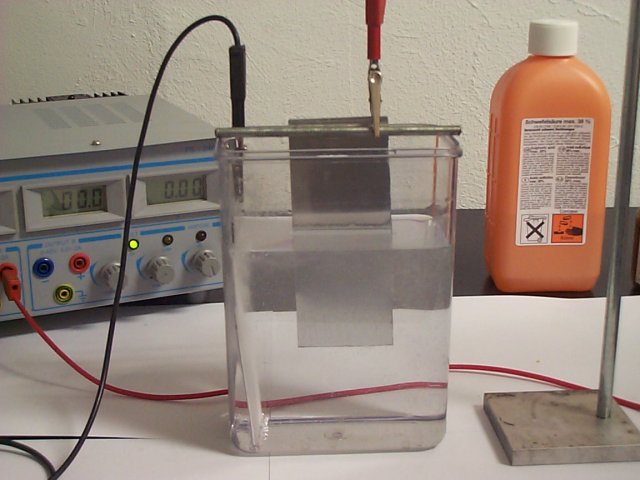
The image shows a very simple setup: aluminum sheets were attached to two short aluminum rods using the crocodile clips of the power supply. On the left, the cathode plate is suspended across the bath, connected to the negative terminal. In the center, the aluminum sheet to be anodized hangs as the anode, connected to the positive terminal. If you look closely, you can see the “mist” of tiny hydrogen bubbles rising from the cathode. During this shot, the current was 1.0 ampere.
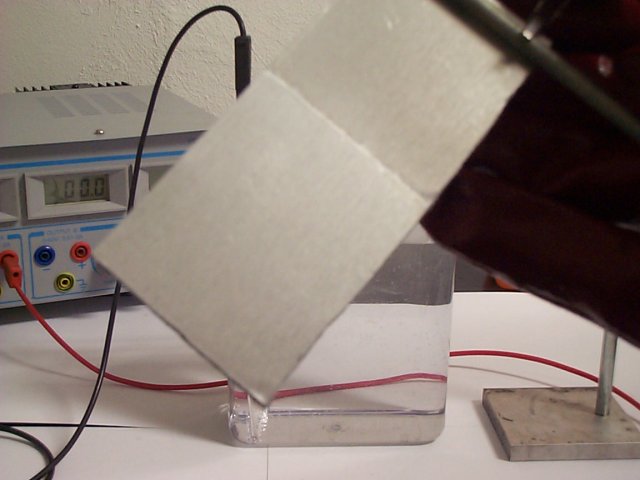
After about 45 minutes, the sheet has reached the desired layer thickness. Here you can clearly see the difference between the anodized and the original surface. Depending on the alloy and layer thickness, the results can vary.
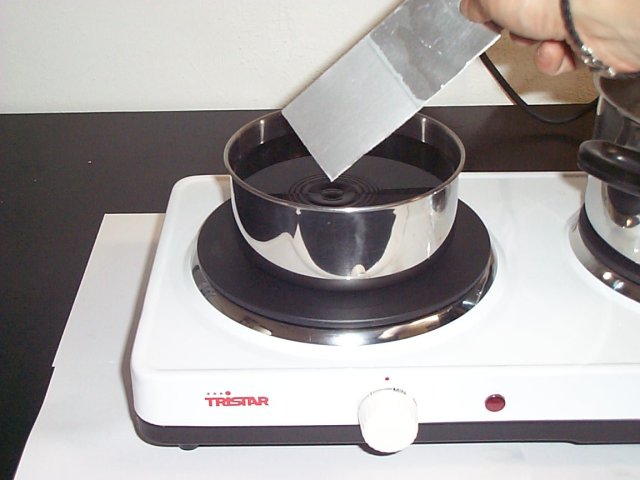
Now, after thorough rinsing under water, the workpiece goes into the dye bath. The bath has already been heated to 50 °C. If handled carefully and contamination of the bath with foreign substances is avoided, it can be used for many years and for a large number of workpieces. There are appropriate additives for preservation and pH stabilization.
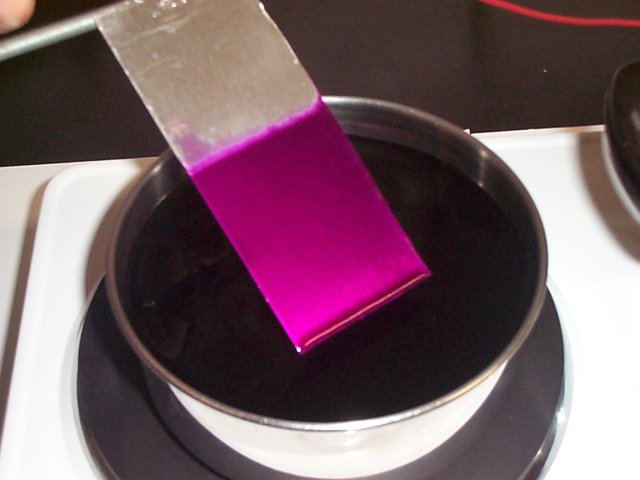
The dwell time in the bath depends on the shade, desired saturation, and color concentration. Here, the sheet was dyed for five minutes in a bath containing 3 grams of violet per liter, with gentle swaying of the sheet. By this point, it is already visible where anodizing occurred and where it did not: only the (hopefully formed) anodic layer absorbs the color – on the untreated upper part, the dye immediately beads off.
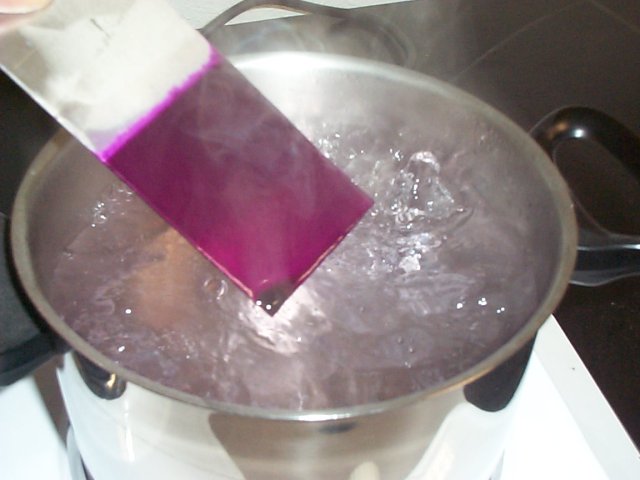
After dyeing, the workpiece goes directly into the sealing bath (“sealing” = Versiegelung in German). The bath must be at least 96 °C – it should be boiling throughout the entire sealing process! Although pure deionized water can also achieve sealing, for perfect and reproducible results, special sealing additives should be used. These ensure an optimal pH, richer colors, very high UV resistance, and harder surfaces.
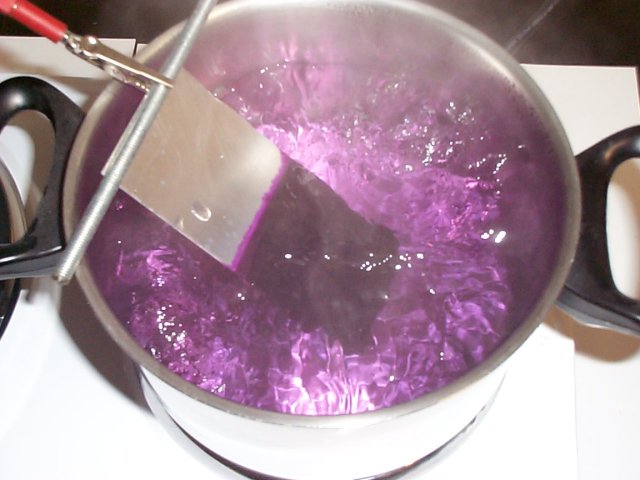
The closing of the anodic pores over the trapped dye and the formation of the hard, resistant surface takes approximately 45–60 minutes. At the very beginning of the sealing process, significant bleeding of the dye may occur; however, this is not a problem with the high coloring strength of anodizing dyes, even for more intense shades. With appropriate additives, a rapid pore closure without any dye bleeding can be achieved.
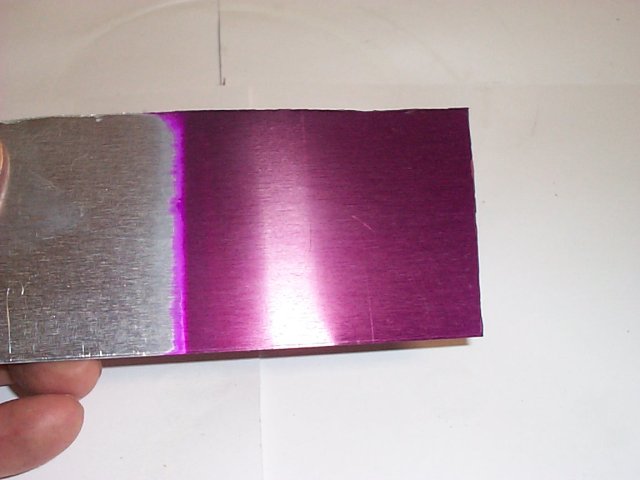
Despite the extremely simple procedure, the result is already impressive. After removal, the workpiece is ready for immediate use. In the anodized area, the small initial scratches are still quite visible – a clear indication that anodizing does not forgive surface imperfections. For perfect surfaces, extremely thorough pre-treatment (polishing, brushing, etc.) and meticulous cleaning are absolutely essential!
Powered by Phoca Gallery